Studio&Natural Light Portraits
We were given a task to do practice shots outside using natural light and then in the studio. I went with my partner outside to the castle nearby our university. After taking photos and downloading them, I created contact sheets.


Firstly, I would like to start with talking about natural light portraits. Unfortunately, when we came out the sunlight has gone but it was still partly cloudy so the light was good and it wasn't dark. I put ISO on 400 as it wasn't very bright outside and my aperture was F5.6.
I decided to start with this kind of high-angle shot which focuses on the girl and there is no other background. There was also a strong wind which played with hair so it turned to be a shot of a tired girl who doesn't even have energy to find a bench and sits on the road. Her pose is close and she doesn't want to share her feelings with everyone.

This picture looks different because the girl's mood is changed. Here she has an active pose and a slight smile on her face. I included more background to make a shot more straight and to position a girl differently.

F5.6, 1/125, ISO 400, 0 exposure bias
In this low-angle picture I liked the horizon and the way it looked titled. I find her pose quite artistic as we can see a triangle in her hands. However, because of the light that comes from the sky the girl isn't clearly seen on the photo.

F4.5, 1/125, ISO 400, 0 exposure bias
These photos below were a bit difficult because I was struggling with light. I got many shots where the girl's white clothes were too bright and I tried to change settings couple of times to get the right result. Finally, I got two best ones and here I used aperture F8 and ISO 400. I didn't underexposed it because I didn't want to get them dark.

The picture above I consider to be the better one as it clearly shows us the character and nothing else. She doesn't have a specific pose nor she tries to appear unusual in front of the camera. I liked the contrast of colours which is bright but at the same time doesn't distract us from the girl. The doors of the cathedral make this photo more authentic and brings a historical mood in it. I also liked the fade in the background and the way it contrasts with white colours.
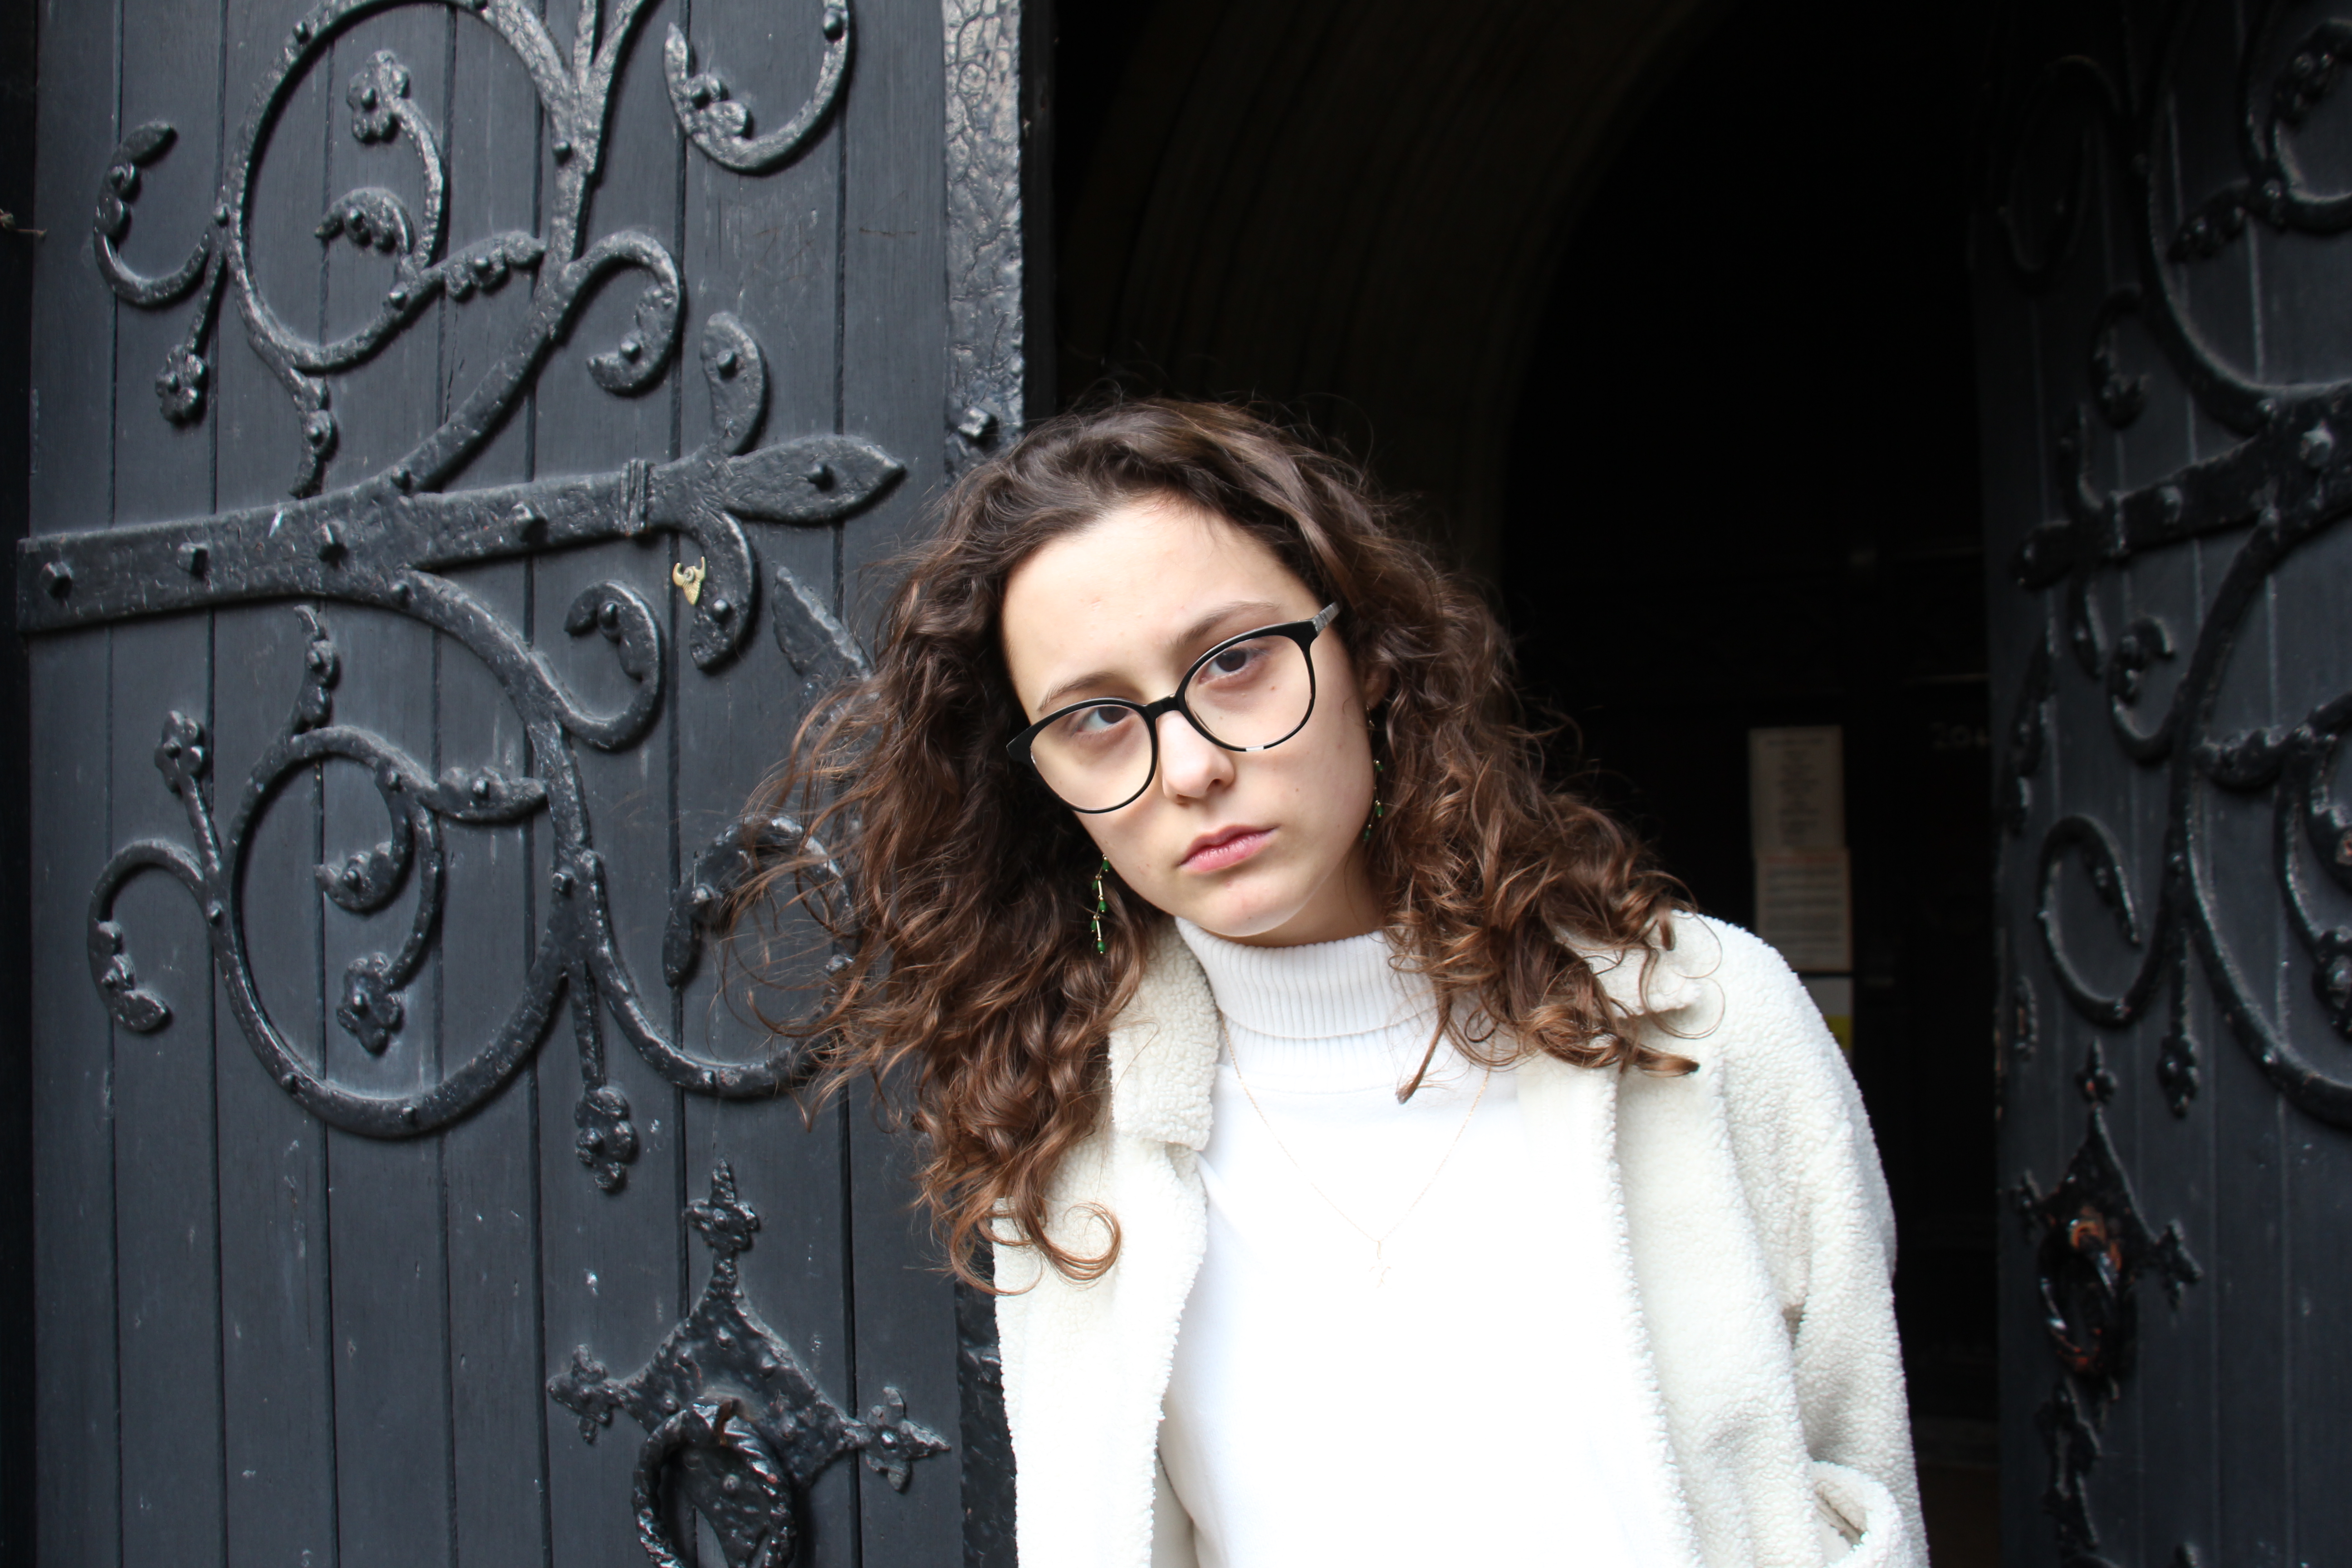
F8, 1/125, ISO 400, 0 exposure bias
I liked natural light portraits because it seems to me that it's easier to adjust camera to natural environment. It didn't took much effort for me to figure out which settings are best to use outside. I also enjoyed this process because in nature you have a wider range of locations.
Now I would like to move to the studio portraits which turned to be more challenging for me.
Because I haven't underexposed the images, I got lots of them blurry and very bright which was inappropriate.
As it was practice, and we didn't have much time to concentrate one each type of shot, so we had a model who had all poses arranged before.
We started with ISO 100 but then I also tried it on 200 which was fine for me. An aperture was 4 but the main problem was with the exposure as I missed the fact we had to underexpose it to -2 and I had it on 0. Therefore, I couldn't get the right result. Then my tutor explained this to me and I started to get good images which you can see below.


In the pictures above I liked how background, clothes and expression of the model work together so I decided to make the black and white in order to make it deeper.


F4, 1/125, ISO 200, -2 exposure bias
In these photos exposure made colours muted and here we have model closer and good framing as we have model straight in the middle of the image with a low key background.
I wish I had more close-up shots but unfortunately because I understood the problem of the exposure a bit late, those close ups were too bright.
Here is my final result of two portraits in natural light and studio.


Despite all technical problems, I enjoyed the first practice in the studio and it was very useful for me. In the natural light I don't need so much efforts in setting up camera which makes the shooting easier. On the other hand, we are dependent on the weather while in the studio we can adjust everything in depending on how we want to see the final image. But now I am able to compare these two environments which also may give me a more clear idea of what I which one I want to use in my main project.


Good that you have completed this - it was a practice so that you can understand your settings better - using a camera takes a lot of practice and self study
ReplyDelete